How to Vacuum Seal Sauces for Maximum Freshness and Long-Term Storage
Learn step-by-step how to vacuum seal homemade sauces, dips, and dressings to extend shelf life, preserve flavor, and prevent freezer burn.
Written by FoodieManiac
With over 8 years of sauce-making experience, I've tested hundreds of techniques and products to bring you practical, reliable advice. Learn more about me →
Why Vacuum Sealing is the Best Way to Preserve Sauces
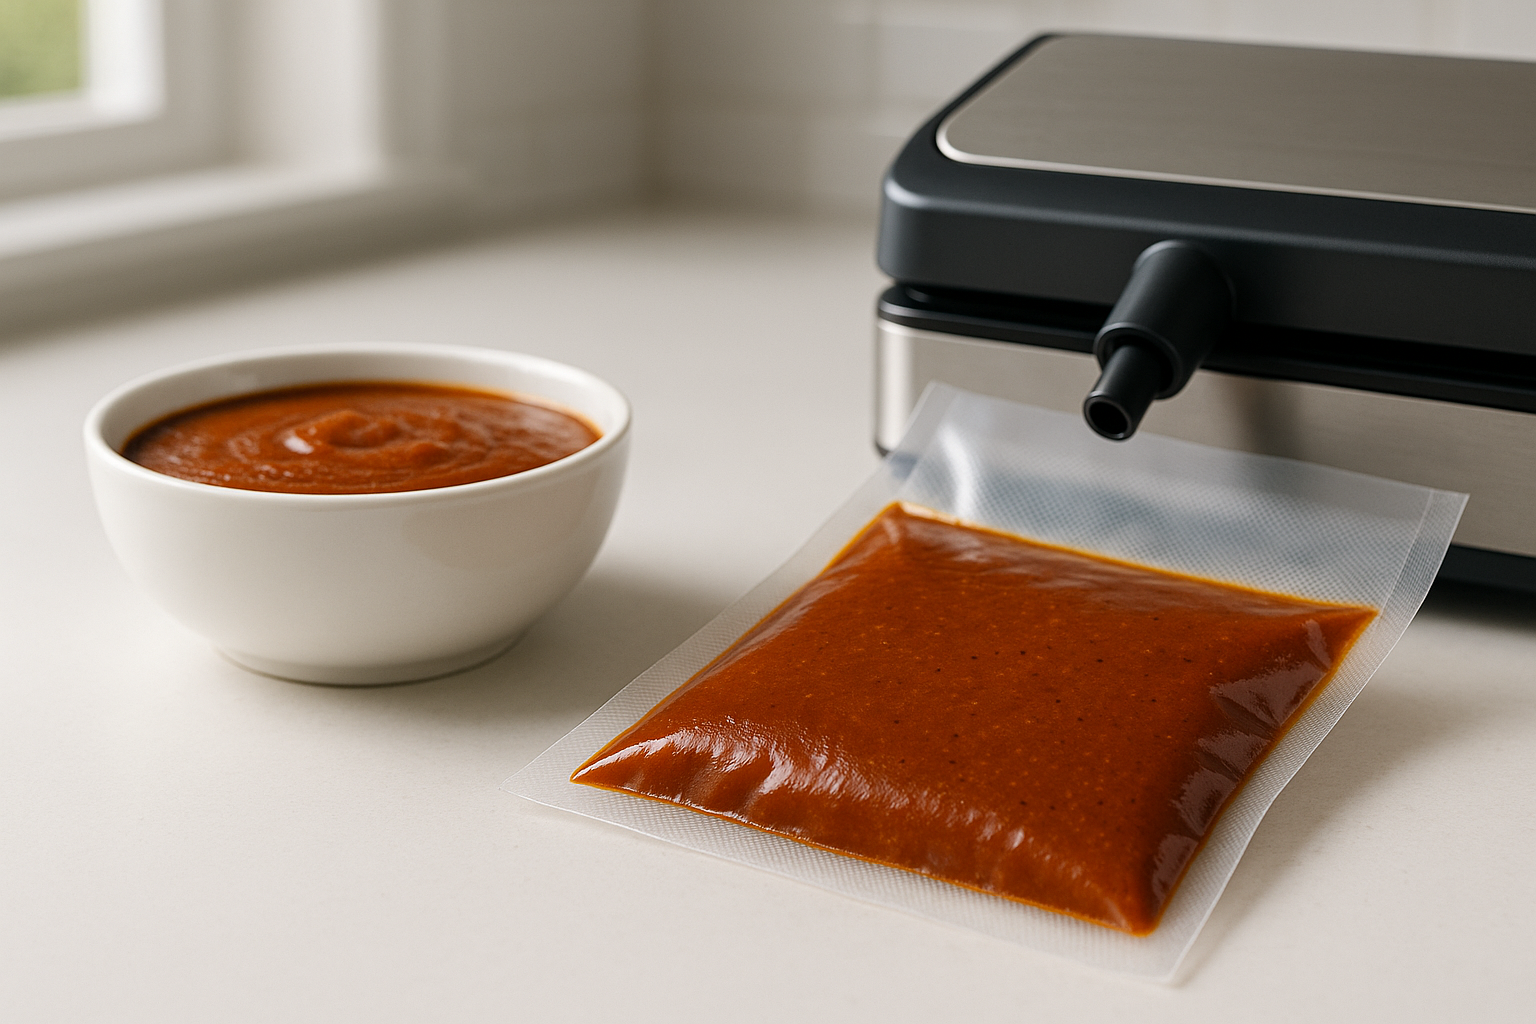
Vacuum sealing is a proven method to extend the shelf life and freshness of sauces while preserving flavor, color, and nutrition. By removing air, vacuum sealing prevents oxidation, spoilage, and freezer burn - major enemies of homemade sauces like Kansas City-Style BBQ Sauce or Creamy Sun-Dried Tomato Pasta Sauce. This technique is ideal for both cooked and raw sauces, enabling you to batch-cook and store dips, dressings, and marinades with optimal safety and quality.
Key Benefits of Vacuum Sealing Sauces
- Extended shelf life: Vacuum-sealed sauces last 3–5 times longer in the refrigerator and up to 18 months in the freezer compared to regular storage.
- Fresher taste: Sealing eliminates oxygen, which preserves delicate flavors and prevents off-notes caused by oxidation.
- Protection from freezer burn: Vacuum-sealed sauces like Roasted Tomato Basil Sauce maintain their original texture and color in the freezer.
- Efficient storage: Flat-sealed pouches take less space than containers or jars, allowing for organized stacking and quicker thawing.
- Portion control: Seal sauces in recipe-ready portions - ideal for quick weeknight meals or meal prep.
Choosing Sauces Suitable for Vacuum Sealing
Most sauces can be vacuum sealed, but some require special handling. Smooth, thick sauces like Creamy Parmesan Peppercorn Dressing, Paprika Sauce, or Smoky Bourbon BBQ Sauce are excellent candidates. However, sauces containing large chunks or high-fat emulsions (like mayo-based dips) need extra care to avoid separation or crushing.
- Do vacuum seal: Tomato sauces, vinaigrettes, BBQ sauces, purees, aiolis, fruit sauces, and most dips.
- Use caution: Mayonnaise-heavy sauces, dairy-based dips, and sauces with large vegetable or herb pieces. For these, freeze before sealing (see below).
- Do not vacuum seal: Carbonated, highly fermented, or still-warm sauces. Always cool completely to avoid bag rupture or bacterial growth.
Tools and Equipment Needed
- Vacuum sealer: A countertop vacuum sealer (chamber or external) is best. Handheld sealers can work for small batches.
- Vacuum bags or pouches: Use food-safe, BPA-free bags. For liquids, choose bags at least 3 mil thick to prevent leaks.
- Freezer-safe containers or ice cube trays (optional): For pre-freezing sauces before sealing.
- Ladle or funnel: For clean, spill-free bag filling.
- Marker and labels: Clearly label every bag with sauce type and date.
Step-by-Step Guide: How to Vacuum Seal Sauces Safely
1. Cool Sauces Completely
Hot or warm sauces will create steam, which interferes with sealing and can encourage bacterial growth. Always chill sauces in the refrigerator to below 40°F (4°C) before vacuum sealing. For food safety, never vacuum seal sauces above room temperature.
2. Pre-Freeze for Best Results
To prevent liquid suction into the vacuum sealer (which causes sealing failure or messy leaks), pre-freeze sauces. Pour cooled sauce into a shallow dish, ice cube tray, or directly into vacuum bags (leave bags open) and freeze until just solid - about 1–2 hours for small portions, 3–4 hours for larger bags. Pre-freezing is essential for thin sauces and dressings like Greek Lemon-Oregano Vinaigrette or Olive Garden Italian Dressing.
3. Portion and Fill Bags
- Decide portion sizes (½ cup, 1 cup, or recipe-specific amounts).
- Use a ladle or funnel to fill bags, leaving at least 2 inches (5 cm) of headspace for sealing.
- Wipe the inside top edges of bags to ensure a clean, secure seal.
4. Vacuum and Seal Properly
- Place pre-frozen sauce bags in the vacuum sealer with the open end in the machine.
- Use the “moist” or “liquid” setting if available. Chamber sealers are best for liquids, but external sealers work with pre-frozen content.
- Press “seal” and allow the machine to remove air and heat-seal the bag.
- Double-seal if storing for over 6 months or for sauces with higher liquid content.
5. Label and Store
- Immediately label bags with sauce name and date.
- Store vacuum-sealed sauces in the refrigerator for up to 2–3 weeks, or in the freezer for up to 18 months.
Shelf Life: How Long Do Vacuum-Sealed Sauces Last?
Vacuum sealing slows spoilage and preserves peak flavor. In the refrigerator, vacuum-sealed sauces typically last 2–3 weeks, compared to 3–5 days in unsealed containers. In the freezer, most sauces - such as Spicy Maple BBQ Sauce or Lebanese Tarator Sauce - maintain quality for 12–18 months. For a detailed breakdown, see How Long Do Sauces Last? Shelf Life Guide for Homemade & Store-Bought.
| Sauce Type | Fridge (Vacuum Sealed) | Freezer (Vacuum Sealed) |
|---|---|---|
| Tomato-based (e.g., pasta sauce) | 2–3 weeks | 12–18 months |
| Vinaigrettes | 2–3 weeks | 12–15 months |
| BBQ Sauces | 2–3 weeks | 12–18 months |
| Creamy dips/dressings | 1–2 weeks | 6–12 months |
| Nut or tahini-based | 2–3 weeks | 12–15 months |
How to Thaw and Use Vacuum-Sealed Sauces
- Thaw overnight in the refrigerator for best texture and food safety. Place sealed bag on a plate to catch condensation.
- Quick-thaw: Submerge bag in cold water for 30–60 minutes. Never use hot water, as sudden temperature changes can alter texture or split emulsions.
- Cut open the bag, reheat gently if needed, and whisk to restore smoothness - especially for creamy or emulsified sauces.
- Use thawed sauces promptly; do not refreeze once thawed.
Tips for Preventing Separation and Maintaining Texture
- Emulsified sauces: For sauces like Creamy Buffalo Blue Cheese Dip or Feta Dill Dip, pre-freeze and seal quickly to minimize separation. Whisk after thawing to reincorporate ingredients.
- Herb or chunky sauces: Pulse in a blender before sealing to reduce large pieces, which freeze and thaw more evenly.
- Acidic sauces: Sauces high in vinegar or citrus (like Garlic Lemon Tahini Dressing) freeze well and rarely separate.
- Dairy-based sauces: Add a stabilizer (1/2 tsp cornstarch per cup) to help maintain a creamy consistency after thawing. Avoid freezing whipped or delicate cream sauces.
Vacuum Sealing vs. Other Sauce Preservation Methods
Vacuum sealing offers a superior barrier to air compared to regular freezing or canning. Unlike canning - which requires specific temperatures and pH for safety - vacuum sealing is faster and more flexible for a variety of sauce types. For a comparison with canning, see How to Can Sauces Safely at Home: Step-by-Step Guide for Beginners. If you want to maximize shelf life without freezing, consider combining vacuum sealing with pasteurization (heating sealed sauces to 160–185°F / 71–85°C for 15–20 minutes); more details are available in How to Pasteurize Homemade Sauces for Longer Shelf Life at Home.
Real-World Applications: Batch Cooking and Meal Prep
Vacuum sealing is indispensable for meal prep and batch cooking. Prepare large quantities of your favorite sauces - like Buffalo Sauce or Authentic Japanese Teriyaki Sauce - then portion and seal for weeks or months of ready-to-use flavor. This method reduces waste, saves time, and ensures consistent results. For more on fast flavor boosts, check out How to Make 3-Ingredient Sauces.
Safety Considerations: Avoiding Common Vacuum-Sealing Mistakes
- Never seal hot sauces: Cool to at least 40°F (4°C) first to prevent bacterial growth and bag failure.
- Do not overfill: Leave enough headspace to allow strong seals and prevent leaks.
- Double-bag if needed: For acidic or strongly colored sauces (tomato, curry), double-bag to prevent staining and leaks.
- Inspect seals: After sealing, check for air bubbles or weak seams. Reseal if needed.
- Label clearly: Always date and identify contents. Rotate older sauces forward for use.
Best Sauces to Try Vacuum Sealing
- Roasted Garlic Parmesan Dressing
- Italian Salsa Verde Sauce
- Wingstop Ranch Dressing
- Freddy’s Fry Sauce
- Green Goddess Dressing
- Jamaican Jerk Marinade
For more ideas, explore our collection of No-Cook Sauces: 10 Fresh Blends You Can Make in Under 5 Minutes.
Conclusion: Maximize Freshness and Flavor with Vacuum Sealing
Vacuum sealing is the ultimate home technique to preserve, store, and enjoy your favorite sauces year-round. With proper cooling, pre-freezing, and portioning, you’ll lock in peak freshness and flavor - whether you’re storing Roasted Red Pepper Hummus, Aji Verde Sauce, or Chipotle Crema Sauce. Follow these detailed steps and safety tips for sauce success every time.
