How to Deglaze and Build Pan Sauces: Step-by-Step Technique Guide
Master deglazing and pan sauce techniques with this guide. Learn how to unlock rich flavors and create restaurant-quality sauces at home every time.
Written by FoodieManiac
With over 8 years of sauce-making experience, I've tested hundreds of techniques and products to bring you practical, reliable advice. Learn more about me →
Understanding Pan Sauces: The Foundation of Flavor
Pan sauces are quick, versatile sauces built in the same skillet you use to cook meat, poultry, or vegetables. The process extracts complex flavors from the fond—the caramelized bits that stick to the pan after searing. Mastering deglazing and pan sauce technique allows you to create restaurant-quality sauces in under 20 minutes, making every meal more memorable.
Step 1: Sear and Build Fond
Why Fond Matters
Fond is the browned residue left after cooking proteins at high heat (between 375°F and 425°F/190°C–220°C). These bits contain concentrated flavor compounds formed by the Maillard reaction. Avoid nonstick pans for this step; use stainless steel or cast iron for optimal fond development.
How to Sear for Maximum Fond
- Pat protein dry with paper towels to ensure browning, not steaming.
- Preheat your skillet over medium-high heat until a drop of water sizzles instantly (about 400°F/205°C).
- Add 1–2 tablespoons of neutral oil with a high smoke point (like canola or grapeseed).
- Lay protein in the pan, leaving space between pieces. Resist moving it for at least 2–4 minutes per side, until a deep brown crust forms.
- Transfer meat to a warm plate. Keep the pan on the burner.
Step 2: Deglaze the Pan
The Science of Deglazing
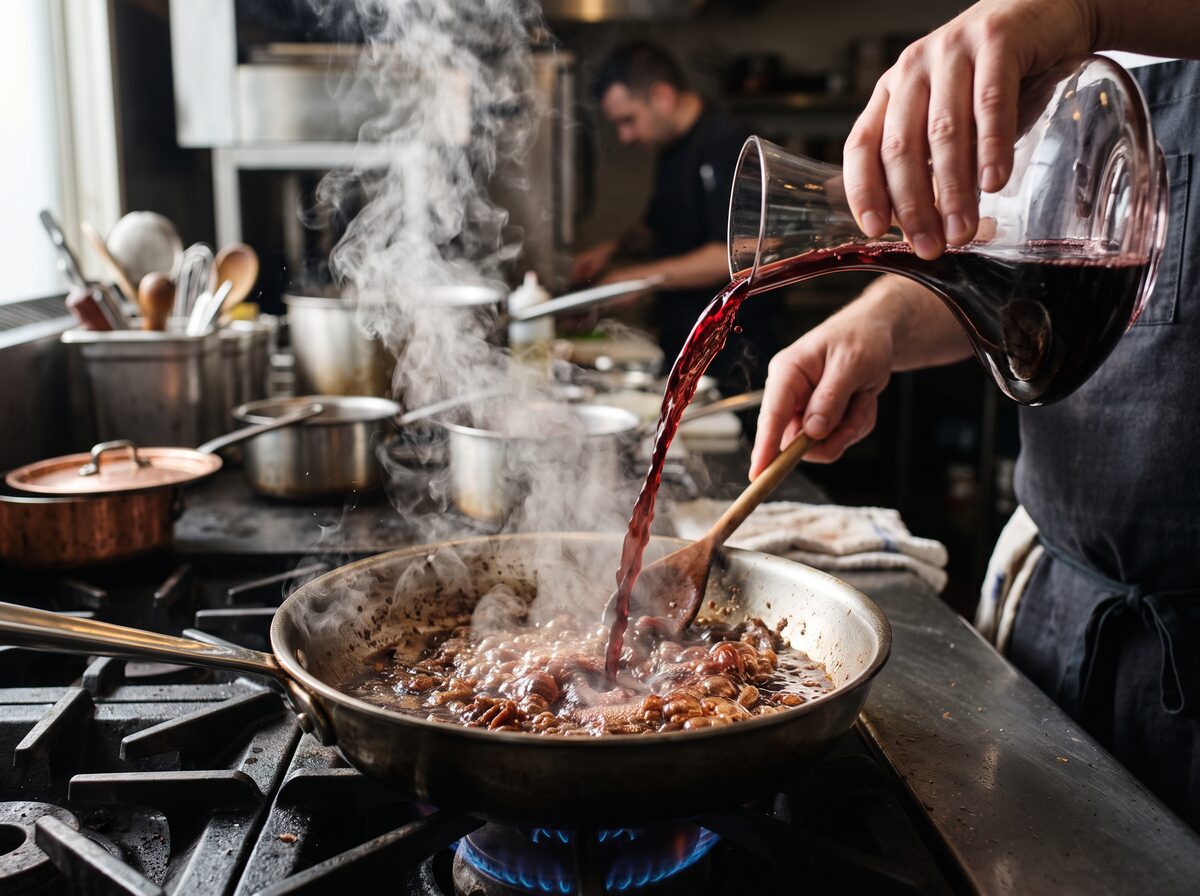
Deglazing involves pouring a liquid into a hot pan to dissolve the fond. This is the essential first step in any pan sauce, as it captures flavor that would otherwise be lost. For an in-depth breakdown of the science and technique, see How to Deglaze for Pan Sauces: Step-by-Step Guide.
Choosing the Right Deglazing Liquid
- Wine: Red or white, 1/2 cup for most sauces. Alcohol lifts flavor and adds acidity.
- Broth or stock: Chicken, beef, or vegetable, 1/2 to 3/4 cup for a milder, savory base.
- Vinegar or citrus: 1–2 tablespoons, for sharp brightness (not as a sole deglazer but as a component).
- Water: Use only if other options are unavailable.
Never add cold liquid to a very hot pan: it can seize the fond. Use room temperature or slightly warmed liquids for best results.
How to Deglaze Properly
- After removing protein, keep the burner at medium-high. If pan looks dry, add 1 teaspoon oil or a knob of butter.
- Pour in 1/2 cup of liquid, scraping the fond with a flat spatula or wooden spoon.
- Let liquid simmer vigorously, stirring until fond is dissolved (usually 1–2 minutes).
- Reduce heat to medium-low to continue building your sauce.
Step 3: Build the Sauce Base
Adding Aromatics and Flavor Builders
After deglazing, add finely chopped aromatics for depth. Classic choices include:
- Shallots or onions: 1–2 tablespoons, sautéed 1–2 minutes until translucent.
- Garlic: 1 clove, minced, added after shallots for 30 seconds (avoid burning).
- Fresh herbs: thyme, rosemary, or tarragon, added early for infusion.
For a robust flavor, consider a small spoonful of tomato paste, Dijon mustard, or a splash of Worcestershire or soy sauce. For technique on using soy and Worcestershire, see Worcestershire Sauce vs. Soy Sauce: Flavor, Uses, and Substitutes Compared.
Simmer and Reduce
Let the sauce base simmer at a gentle bubble (190°F–205°F/88°C–96°C). Reduce by one-third to one-half, concentrating flavors and achieving a syrupy consistency. This usually takes 4–6 minutes. If your sauce is too thin, check out Why Your Quick Pan Sauce Turns Out Thin - Easy Ways to Thicken Fast for instant fixes.
Step 4: Enrich and Finish
Incorporating Butter or Cream
For a glossy, luxurious finish, swirl in 1–2 tablespoons cold unsalted butter off heat. Add butter in small pieces, whisking constantly to emulsify. For cream sauces, add 2–3 tablespoons heavy cream and simmer gently for 1–2 minutes (do not boil or the sauce may break).
If using dairy, keep sauce below 180°F/82°C after adding to prevent curdling. For more on preventing sauce separation, read Why Do My Homemade Sauces Separate in the Fridge? Causes and Solutions.
Balancing and Seasoning
Taste and adjust with:
- Salt and freshly ground pepper
- Acid: a squeeze of lemon, splash of vinegar, or a few drops of hot sauce for brightness
- Fresh herbs, chopped and stirred in right before serving
Step 5: Strain (Optional) and Serve
For an ultra-smooth sauce, pour through a fine mesh sieve before serving. Straining removes bits of aromatics or herb stems and is especially useful for elegant presentations. Serve immediately over sliced meat, vegetables, or grains.
Pan Sauce Troubleshooting and Pro Tips
- Pan Too Hot? If the fond turns black, it's burnt and will make your sauce bitter. Wipe the pan and start over with fresh aromatics.
- Sauce Too Thin? Simmer longer to reduce, or add a cornstarch slurry (1 teaspoon cornstarch mixed with 1 tablespoon cold water) and simmer 1 minute.
- Sauce Too Thick? Whisk in 1–2 tablespoons stock or water to loosen.
- Gritty Texture? Always remove the pan from heat before adding butter or cream, and whisk constantly.
Pan Sauce Flavor Variations and Inspiring Recipes
Mustard-Based Pan Sauce
Add 1 tablespoon Dijon or whole grain mustard after deglazing, then whisk in 1/2 cup cream and finish with butter. This pairs beautifully with pork or chicken. For a deeper dive into mustard BBQ, try Homemade Carolina Gold Mustard BBQ Sauce or Homemade Carolina Gold BBQ Sauce (Tangy Mustard BBQ Sauce).
Creamy Peppercorn Sauce
Crush 1 tablespoon black or green peppercorns and toast in the pan after deglazing. Add 1/2 cup beef broth, reduce by half, then add 1/3 cup cream and 1 tablespoon Cognac or brandy. Simmer to thicken, then finish with butter.
Herb and Citrus Pan Sauce
After deglazing with white wine, add 1 teaspoon lemon zest, 1 tablespoon lemon juice, and a handful of chopped fresh parsley or tarragon. Swirl in butter to finish. Try a similar flavor profile with Homemade Greek Lemon-Oregano Vinaigrette as a table sauce.
Savory Garlic Pan Sauce
After deglazing, sauté 2–3 minced garlic cloves for 30 seconds, then add 1 teaspoon soy sauce and a splash of cream or butter. For a garlic-forward cold sauce, explore Authentic Lebanese Toum (Garlic Sauce) Recipe.
Spicy or Sweet Variations
Add 1–2 teaspoons hot sauce, chipotle puree, or honey after reducing. For sweet-spicy inspiration, see Spicy Maple Bourbon Glaze for Grilled Meats or Spicy Maple Sriracha BBQ Sauce.
Vegetarian Pan Sauces
Use roasted mushrooms or vegetables for the fond, and deglaze with vegetable stock or white wine. Finish with butter and fresh herbs. For creamy, plant-based sauces, try Thermomix Creamy Roasted Beetroot & Horseradish Dip or Creamy Roasted Jalapeño Ranch Dip.
Essential Equipment for Pan Sauce Success
- Stainless Steel or Cast Iron Skillet: Required for fond development.
- Flat-Edge Spatula or Wooden Spoon: Best for scraping up fond.
- Small Whisk: Ensures smooth emulsification of butter or cream.
- Fine Mesh Strainer: For elegant, lump-free sauces.
- Thermometer: To monitor sauce temperature (ideal finishing temp: 160–180°F/71–82°C when adding dairy).
Storing and Freezing Pan Sauces
Let sauce cool to room temperature, then refrigerate in an airtight container for up to 3 days. To freeze, portion into small containers or ice cube trays for easy reheating. Learn best practices in How to Freeze Sauces for Maximum Freshness: Methods, Tips, and Mistakes to Avoid and Freezing Sauces 101: Best Sauces to Freeze and How to Thaw Them Safely.
Pairing Pan Sauces with Other Dishes and Sauces
Pan sauces are endlessly adaptable. Spoon over steak, chicken, pork chops, roasted vegetables, or even grains. For creative pairings, see How to Pair Sauces With Grains: Perfect Matches for Rice, Quinoa, and More. You can also serve alongside other bold sauces for contrast or variety, such as Authentic Peruvian Aji Verde Sauce Recipe (Spicy Green Sauce) or Homemade Chimichurri Sauce for Grilled Meats.
Conclusion: Mastering the Pan Sauce Technique
Deglazing and building pan sauces transforms everyday cooking into a high-impact flavor experience. Use the right pan, control your heat, choose appropriate liquids, and finish with butter or cream for richness. Every pan sauce can be customized with aromatics, herbs, and acids for endless possibilities. For another detailed technique guide, review How to Deglaze Like a Chef: Essential Technique for Flavorful Pan Sauces. Practice, taste, and adjust—soon you’ll be creating signature sauces for any meal.
TAGS
Related Articles
Freezing Sauces 101: Best Sauces to Freeze and How to Thaw Them Safely
Discover which sauces freeze well, step-by-step freezing methods, and how to safely thaw for best flavor and texture. Preserve your homemade sauces longer.
How to Freeze Sauces for Maximum Freshness: Methods, Tips, and Mistakes to Avoid
Learn the best techniques to freeze sauces, dressings, and dips. Discover which sauces freeze well, storage tips, and how to thaw for best results.
How to Deglaze for Pan Sauces: Step-by-Step Guide to Rich, Flavorful Results
Master deglazing for pan sauces with this step-by-step guide. Learn the best liquids, timing, and techniques for restaurant-quality sauces at home.
How to Deglaze Like a Pro: Unlocking Deep Flavor for Restaurant-Quality Sauces
Master deglazing to build rich, complex sauces at home. Step-by-step techniques, liquid choices, and chef tips for pro-level flavor every time.